Are your shutters looking a bit weathered? Does it seem like your shutters need a bit of tender loving care? Well, here’s something you may not have known: you can actually PAINT your shutters! Did you know that? Painting your shutters will not only help to alleviate some of the routine wear and tear throughout the passing seasons, but will also help to extend their overall life and give them furthered longevity. Today, we’ll take you through a truncated, step-by-step guide on how to paint your beloved shutters. Let’s get started!
WHAT TYPE OF SHUTTERS DO YOU HAVE?
The question you should first ask yourself is this: ‘What Material are my Shutters made of’? This is very important because, depending on your home’s shutter material, different types of paint and or different methods will need to be applied. Again, before you proceed with buying tools or scouting for paint, make sure that you KNOW what type of materials your shutters are made from; this could be wood, vinyl, or plastic. In this tutorial, we will be solely covering the process of painting WOODEN SHUTTERS.
ARE YOU WILLING TO REMOVE YOUR SHUTTERS ENTIRELY?
Removing your old shutters in order to give them a fresh coat of paint isn’t always completely warranted, but it tends to make the overall process a bit easier. Surely, removing the shutters (and then later reinstalling them) can be a bit of a hassle, but the painting process itself is surely more streamlined and efficient once they’re off; the choice is completely up to you.
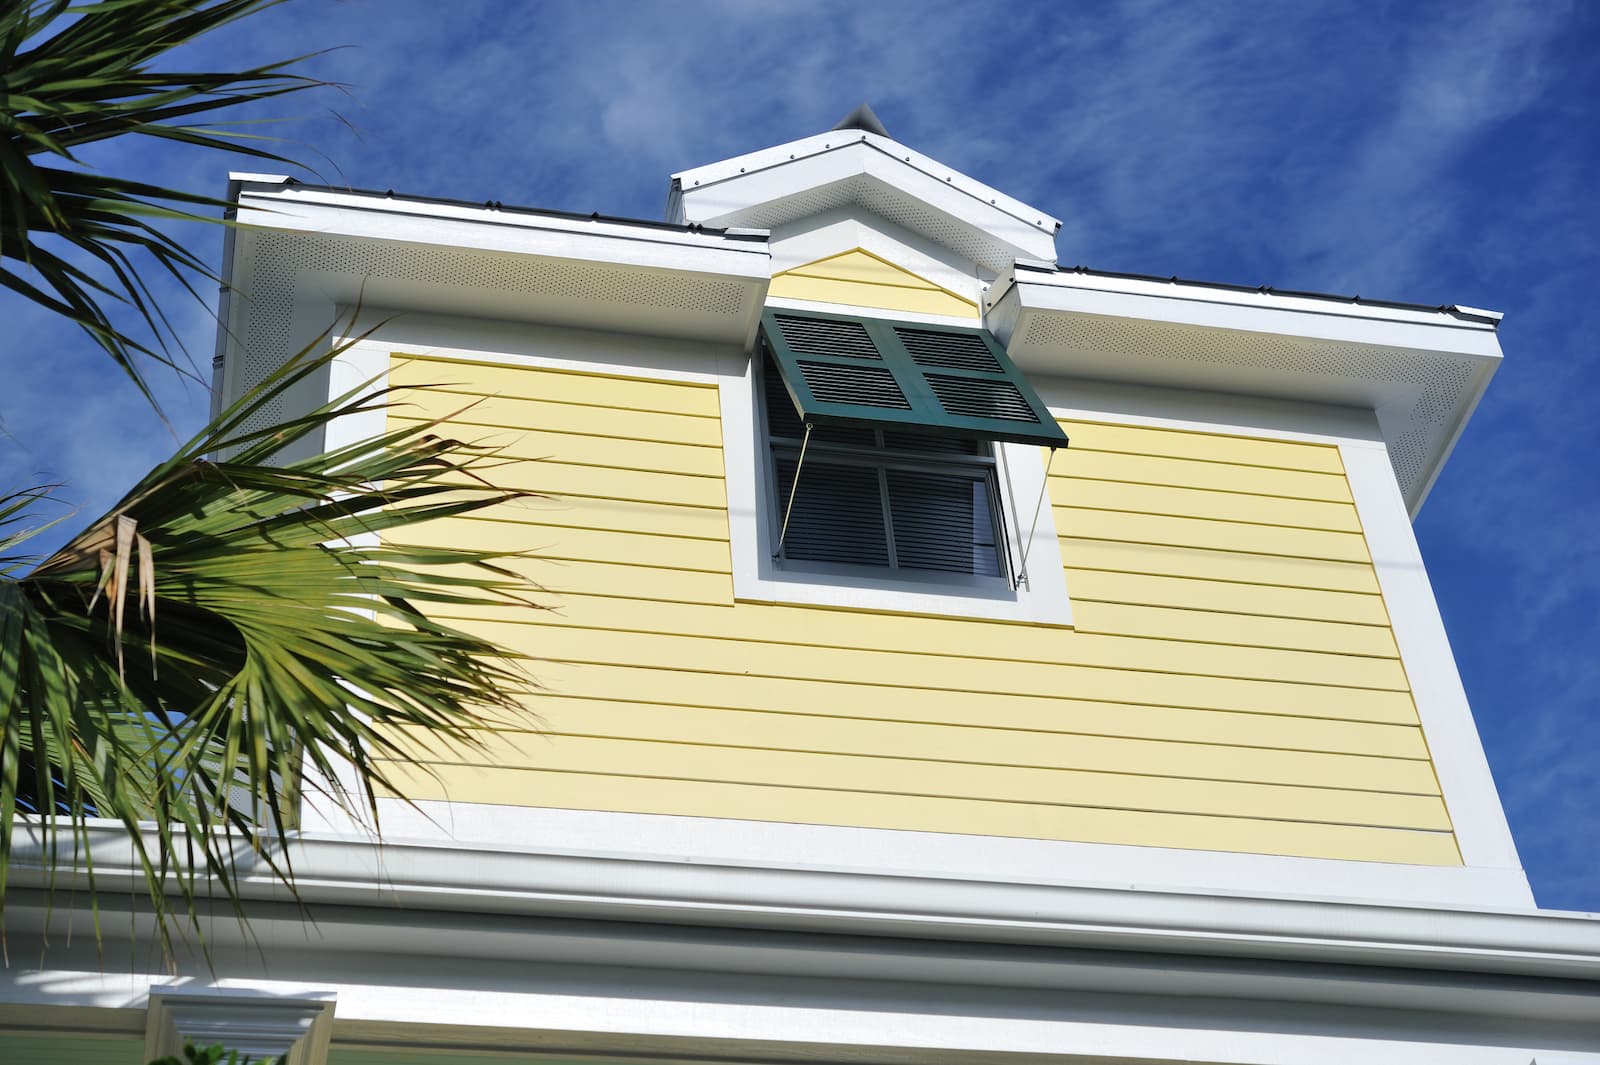
WOOD SHUTTERS
TO REMOVE OR NOT TO REMOVE?
If your shutters are made from wood, then this is the guide for you! As always, when it comes to painting, the prep stage is extremely important. As mentioned prior, you need to decide if removing the shutter is something you wish to do, or if you prefer to just leave them as they are and paint them directly on the house; should you decide to leave them on, you will need to, of course, properly tape off and mask certain areas that you don’t wish to have painted. It may be time consuming, but unscrewing those wooden shutters and painting them individually is much simpler in the long run, especially if you have a second (or third, etc.) story adorned with said shutters, as well.
PREPPING FOR PAINT
One of the most important parts of any project that involves repainting something (in this case, wooden shutters) is prepping the surface; this may be the difference between a fantastic and flawless paint job, or one that looks strikingly unappealing (and may even crack and or peel off down the road).
*You need to remove the majority of the existing, old layer(s) of paint. To do this, use a paint scraper or chemical stripping agent.
*Sand the shutters with sandpaper in order to smooth out any rough edges and or stubborn tufts of paint that did not come off with the previous step of paint removal.
*Prime the shutters! You will need an exterior primer in order to do this, and you want to make sure every inch of the surface area is covered with an even coat. Upon completing this priming step, the shutters themselves may be gray, white, or other (depending on your choice of primer).
DECIDING ON YOUR PAINT
Although there are a slew of options when it comes to paint mediums, the two best for exterior shutters are Oil-based and Latex. Oil paints tend to be a bit more expensive, but adhere fantastically to wooden surfaces and are far less susceptible to being stained by the wood beneath. Latex paint, however, is cheaper than oil paint and is usually easier to work with. If going with the latex option, be sure to pick a latex paint that is made for exterior use. Both of these paint types are available in an array of color options.
PAINTING THE SHUTTERS
Don’t rush the process; take your time and movie steadily and surely.
*Mix your paint, whether it be latex or oil, until it is even in consistency.
*Pour some of said paint into your paint tray, being sure to spill as little as possible.
*Following the wood grain itself, paint the surface using a large, wide and flat brush. For solid shutters, begin with the center panel and work toward the outer edge. For shutters which are slatted, first paint the slats, being cautious not to allow paint build-up in the corners.
*Paint in thin layers; this process will take a few days regardless, and doing a sloppy job, such as rushing to paint layer after layer, will only end up delaying the paint job and causing uneven paint. Painting in thin layers will ensure that the coats dry evenly and cleanly.
*This is an optional step, but finishing your shutters off (after the paint job itself is finished and completely cured) with a final sealant coat of either varnish or acrylic clear coat will enlongate the life expectancy of your shutters even more (and looks really nice, too).
*Once these steps are complete, and the paint job/sealant job is completed, dried, and cured, you may reinstall the shutters onto your home and enjoy! Great work!